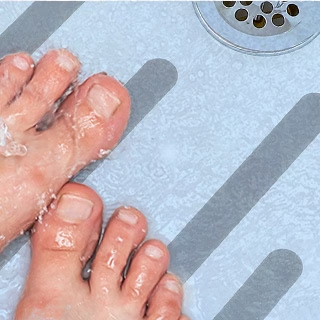
Patterns for the SlipX Solutions Multi-Piece Adhesive Treads
Inspiration for designing fun, slip-resistant and creative bath tread layouts!
.
Modern Oval Design
Ingredients for the Modern Oval Design
- 1 package of SlipX Solutions Multi-Piece Oval Treads.
- One package of treads will cover the first half of your tub.
- We recommend two packages to extend the design for full tub coverage.
How To Layout the Modern Oval Design
Step #1
Lay them out as shown.
Step #2
Step #3
Modern Square Design
- 1 package of SlipX Solutions Multi-Piece Square Treads.
- One package of the Multi-Piece Square Treads will cover the first half of your tub.
- We recommend two packages to extend the design for full tub coverage.
How To Layout the Modern Square Design
Step #1
Lay them out in as shown.
Step #2
Step #3
An optional step is to adjust the positioning of the inner solid squares so they sporadically hug a corner or edge of the larger square.
Field of Flowers Design
- 1 package of the 7.5 inch Safety Treads.
- 1 package of SlipX Solutions Multi-Piece Flower Treads.
How To Layout the Field of Flowers Design
Step #1
We recommend 4 or 5 inches between each tread.
Step #1
Place the 2 larger sizes at the top of the stems.
Step #3
Fireworks Design
Ingredients for Fireworks Design
- 1 package of SlipX Solutions Multi-Piece Starburst Treads.
- 1 package of SlipX Solutions 7.5 Inch Safety Treads.
How To Layout the Fireworks Design
Step #1
Make sure the middle line is elevated a little higher than the two outside lines.
Step #2
Build your large Starburst first and add the smaller starbursts to the outside of the design.
Squares In-Line Design
Ingredients for the Squares In-Line Design
- 1 package of SlipX Solutions Multi-Piece Square Treads.
- 1 package of SlipX Solutions 7.5 Inch Safety Treads.
How To Layout the Squares In-Line Design
Step #1
Add the large square treads along the outside line.
Step #2
Step #3
You can discard the medium sized squares that weren’t used in the design layout.
Fine Line Flowers Design
Ingredients for the Fine Line Flowers Design
- 1 package of SlipX Solutions Multi-Piece Flower Treads.
How To Layout the Fine Line Flowers Design
Step #1
Step #2
Place them on either side of your drain. Then place the remaining 5 large outermost flower rings below, in the design as shown. A row of 3, then a row of 2, trying to center each flower between 2 flower treads.
Step #3
Flowers in Bloom Design
How To Layout the Flowers in Bloom Design
Step #1
Step #2
Place them on either side of your drain. Then place the remaining 5 large outermost flower rings below, in the design as shown. A row of 3, then a row of 2, trying to center each flower between 2 flower treads.
Step #3
Oval Eclipse Design
Ingredients for the Oval Eclipse Design
- 1 package of SlipX Solutions Multi-Piece Oval Treads.
How To Layout the Oval Eclipse Design
Step #1
Step #2
Then add on the 2 side large ovals with the small oval centers on each side of the center ovals.
Step #3
Oval the Drain Design
Ingredients for the Oval the Drain Design
- 2 package of SlipX Solutions Multi-Piece Oval Treads.
How To Layout the Oval the Drain Design
Step #1
We recommend you start with the middle line and center it in line with your drain.
Step #2
Note that the two new outer lines picture are six ovals long rather than four like the center line.
Step #3
Use the picture to help you guide the vertical offset for these two lines.
Squares Squared Design
Ingredients for the Squares Squared Design
- 1 package of SlipX Solutions Multi-Piece Square Treads.
How To Layout the Squares Squared Design
Step #1
Step #2
Then add on 2 more large and small square combinations on each side of the center square.
Step #3